

The Meaningful CMS
Drupal's ability to scale and its overall flexibility comes largely through its depth of abstraction. While this abstraction is critical on a technical level it generally makes tasks more difficult for non-technical users. In this video Michael Keara demonstrates a meaningful CMS user interface system that he built with Drupal 7 to make the content management workflow a simple, intuitive process. The workflow system is based on the State Flow module and uses a new module that Keara created called State Flow Versions. State Flow Versions allows the simple creation and management of multiple versions of a single content item.
This project was done through OneMethod a digital creative agency in Toronto.
the Visual User Interface
This is a demonstration of an enhanced user interface for a context management system built with Drupal 7 for a large food company.
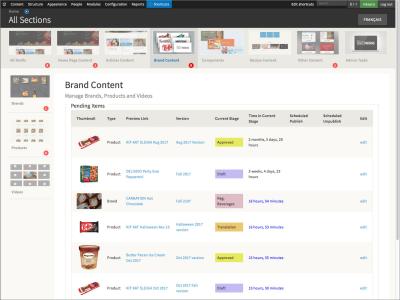
The first thing you see are several graphic menus at the top, images and texts and things representing the different categories of content. We have a home page section, we have articles, we have brand, components, recipes and at the end we have some administrative user interfaces of collected into one grouping for easy access. Below that we have an inbox for the workflow system. We will get more into that in a minute.
Organized Content
Lets just take a look at the articles first. In the article sections, there are three subsections. One is the Articles themselves, there is the Categories, and the Tags. Those last two are taxonomy vocabularies. If you click on them you go to the [usual] pages the Drupal goes to, but the pages are enhanced with this usage context of the menu system and so on. So we can't never get lost and we never lose our way.
And then if we go into article subsection we can see a list of the articles but again it is an enhanced list. Its got visual queues, like the primary image, it's got the tags themselves if they exist (we can see ‘ice cream’ there). It’s got the schedule published and scheduled unpublished dates. That saves you from having to go into each one of those nodes to look to see what those settings are. Those are useful settings for this context and they are brought out and delivered to the user so that they don't have to work.
You can compare that to the standard Drupal interface - the Content List is very flat. It’s very low level. It’s just a list of nodes and it does not tell you much. It does not reveal much about how those nodes are being used within the business itself - within the business context. So the user will have to do a fair amount of fishing to find things using that standard interface. That fishing is eliminated when you use this enhanced interface because it is organized around usage context.
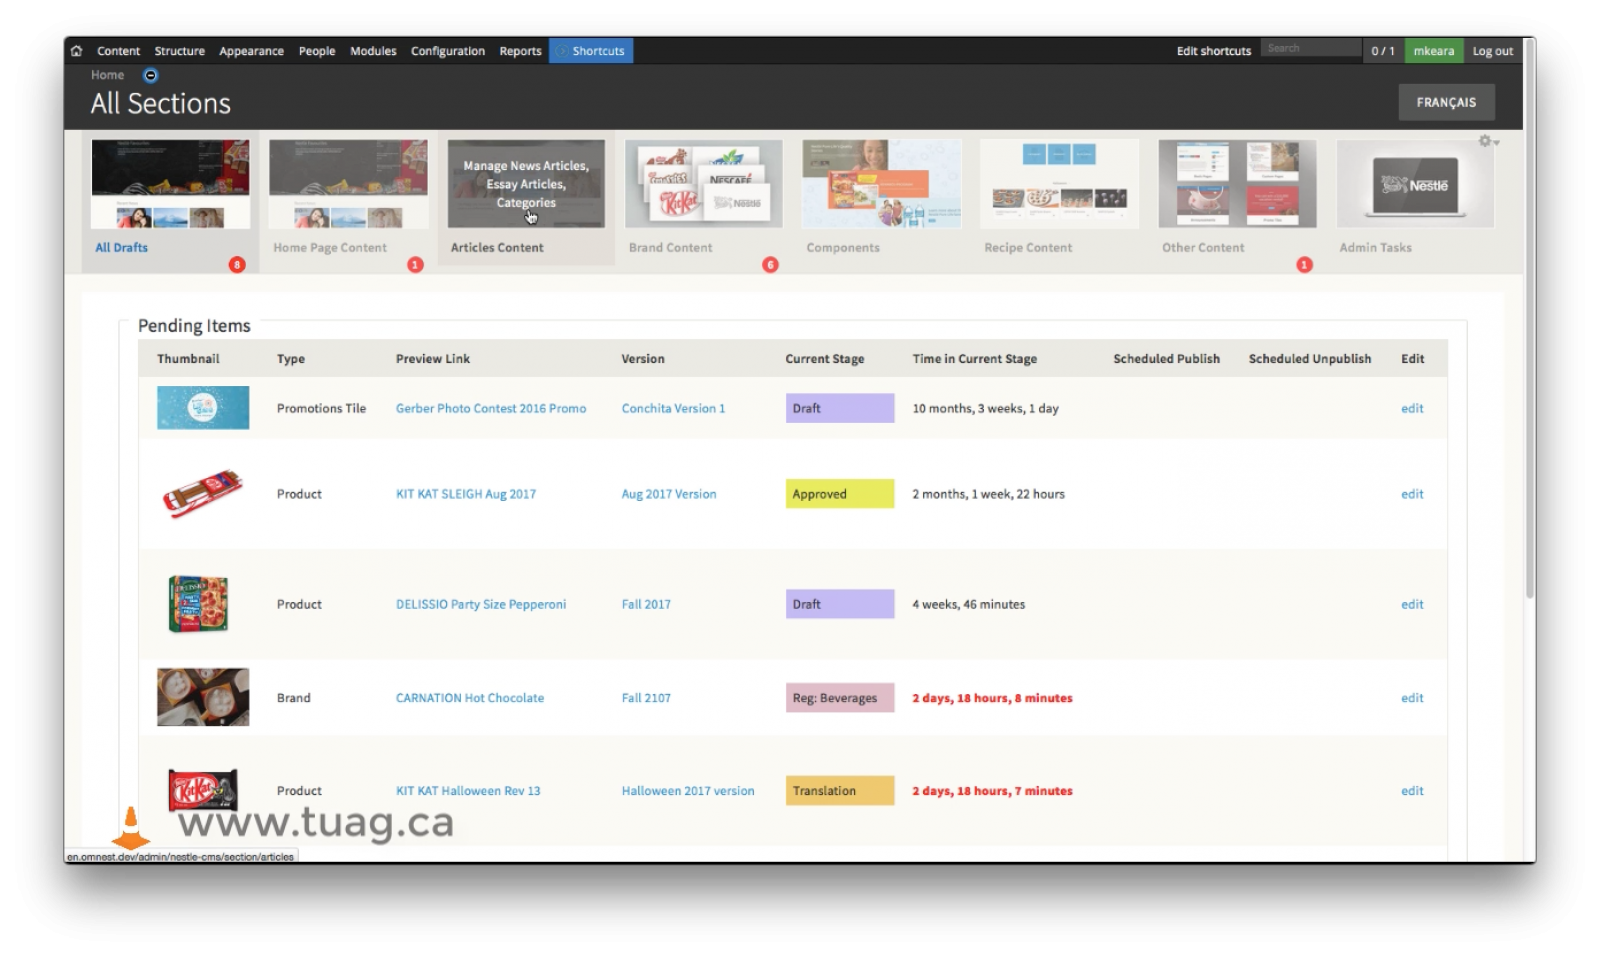
If we inside the brand section, there are three subsections again: Brands, Products and Videos. In the Brands subsection, we can see, there is a new item on the top. This is another mini-inbox for the workflow. There is one item in there that is in process and below that is again the enhanced list of the nodes themselves that are brand items. We can use the same interface that we used in Drupal - it is that same interface, just in a different context. So we can filter down, we can find the ‘Halloween’ node just as we normally would, but all within this particular area of usage.

The Workflow
OK lets say we want to create a new article. Now the button itself is fairly obvious. It used to be a link but now it is nice blue button, we can read it easily. Click on that, we go to the creation form. Just fill it out as you would normally, add some contents, we’ll add some lorem ipsum here. Pick an image. Then when we go down below, we'll see the workflow stuff. So we’re just going to keep this as draft for now. Then we can give the basic information. We give the version a title. We can call it ‘New Article for Demo’. And we put a log message in there just saying it’s an initial draft. That just logs what we are doing.
Then it’s there in the Inbox.
Let’s say we come back to it at a later point to finish off the content. We add those final details. We go down and we are going to change the state. We are now going to push it through to the ‘Regulatory Review’. That's the next state in the workflow. Then we add a note to log what we’ve just done, and hit save.
Now it has changed states. It's gone from the blue colour to a purple colour to give you a cue as to where it is. Now if we happened to be the Regulatory Reviewer, this is what we would see. Just an inbox with just your items. So it is very efficient you don't get lost with other functionality isn’t needed. You see exactly what you need to do. You got two items. One is red which is kinda overdue. But let's just focus on this one right now. We are going to make our Regulatory Reviewer changes. (We make sure everything is ready for publication.) Then when we are done we can send it to Translation. That's the next stage. Add a note and hit save.
Now it's ready for translation. So if we are the translation user, we would probably come in and take a look at the content, read it over and get a sense of what we are going to do and hit the translation button - that’s the standard Drupal approach. See we are in the French site now, so we just get rid of the English content which is in the French version of the node. And now we add our pseudo French content and we are going to say its ready for publication. Basically passing it on for approval for publication.
The Versions User Interface
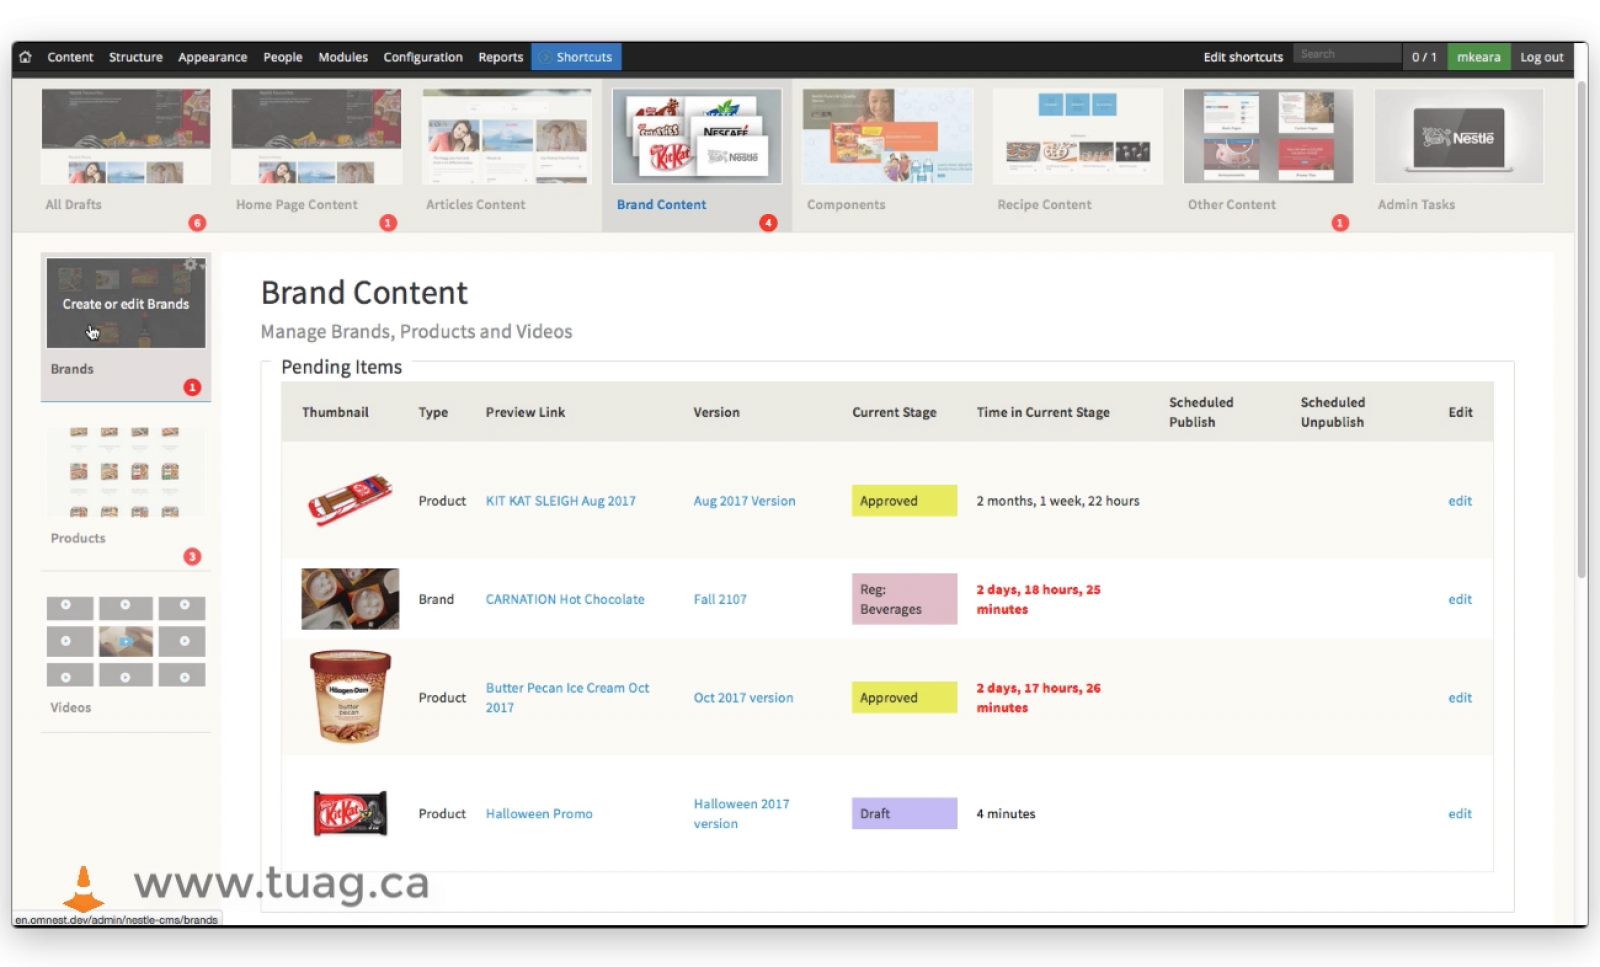
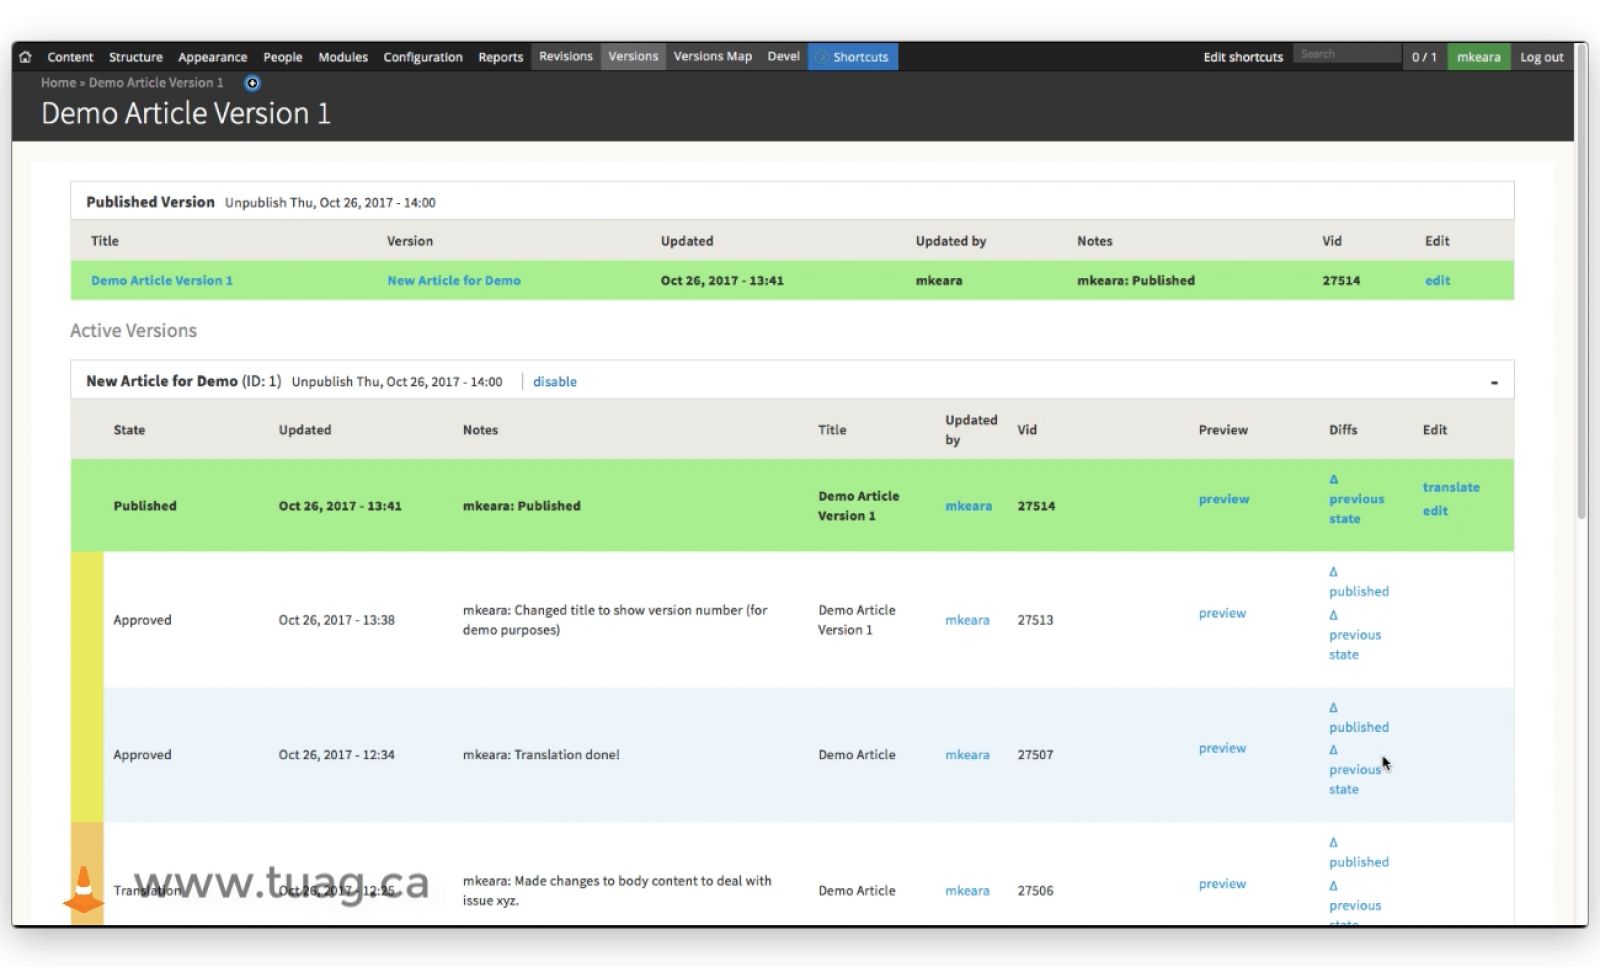
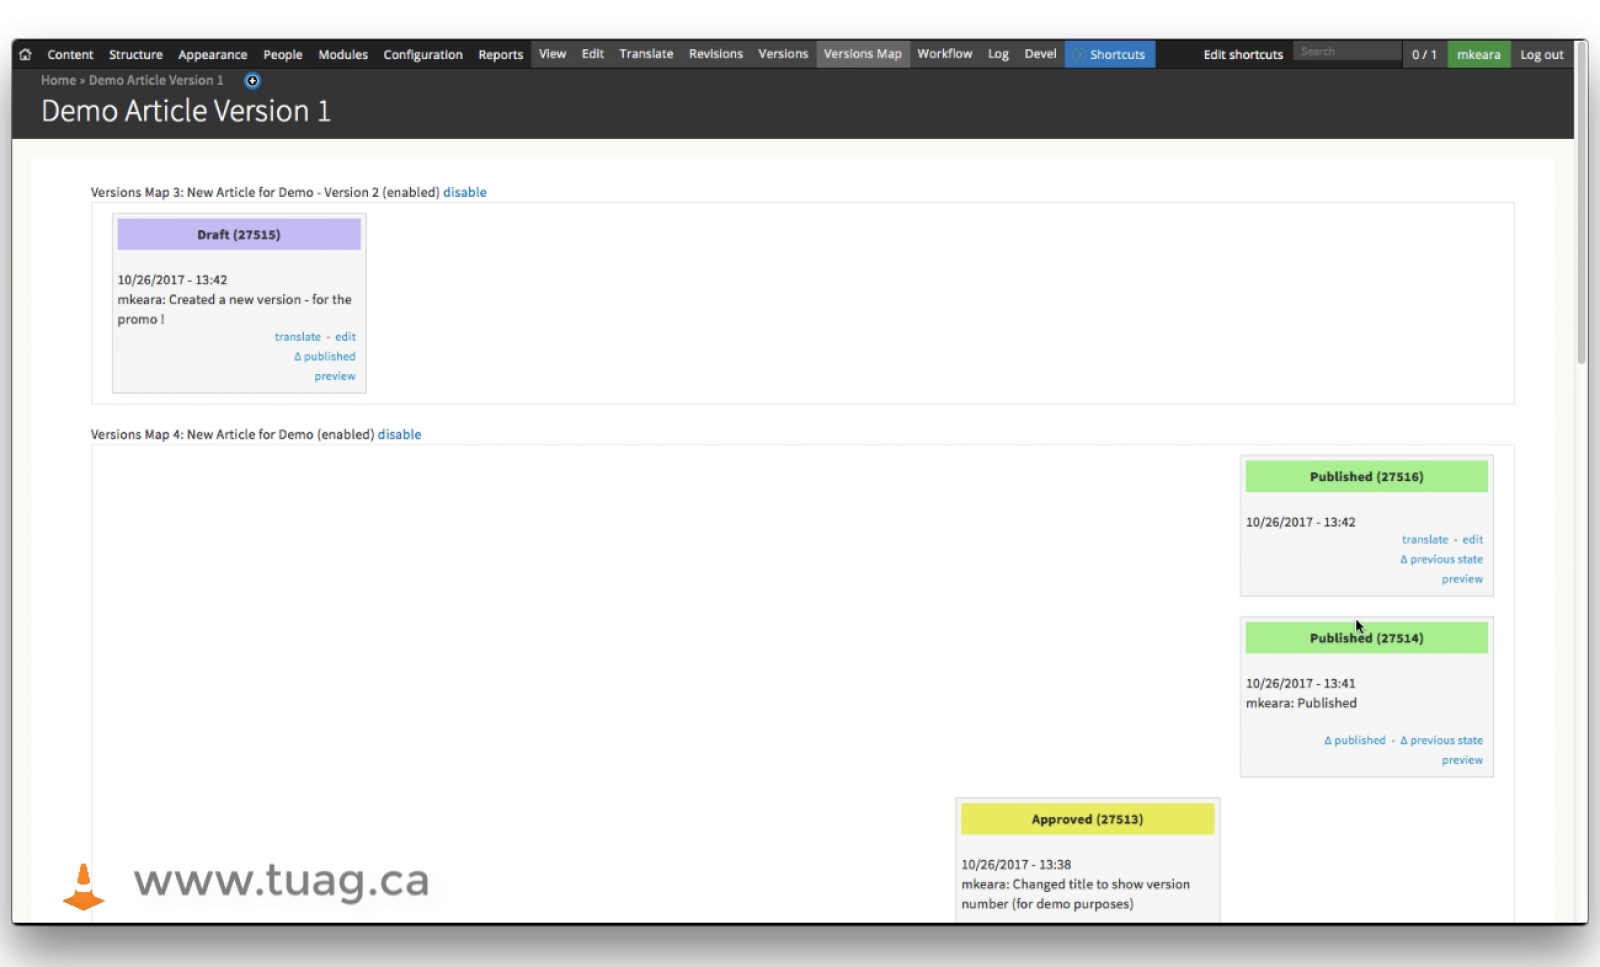
So we can see it's yellow. That means it is approved and ready for publication. Let's just have a look at the Versions interface here for a second. There's another link here in the inbox (in that table). And you can see the entire history of what this content item has been through. You see all the log notes that we have made. You can see the colours on the left that represent the different states that it has been through. And you can see, actually, also the revision ids. You can see from this the version is a collection of revisions grouped together under a high level name that means something to the end user. You can also look at it through a map and that gives you a two dimensional dimensional display. You can see things moving from the bottom left to the top right as it heads toward publication, again with the colour cues. And there’s active links in there so that you can actually do the editing from here.
Publishing
So when we are ready to actually publish, the manager will come in here, set the state to publish. Add some log notes. You can also set publication dates and unpublication dates. So I'm just going to throw in an unpublished time here. (Just later on today, 20 minutes or so. Just for demonstration.) Hit save. When we get back to the article page, we see that it has left the inbox and that is now down below with all the other published items. When we look at the Versions Page we can see that that is there, the green. And there are two instances of green: one is the history itself of that version; and the other is the current published version -just for very quick, direct access. (And you know it is actually published that way as well.)
Making a New Version
You can see that the revision ids are identical. It is the same thing. So the one on the top of course is the one on the node table (in case you are a developer viewing this.) You can edit from here of course and when you want to make a second version you can pick any one of these versions, go in there hit the ‘new version’ [option]. Give it a new version title and then add an appropriate log message. In this case, we are going to get rid of the date as well (the unpublished date). Save it. Now, we have an item in the inbox as well as the item down below which is the published version. So we’ve got this new draft in the workflow again. So if we look at the versions table (i.e. the Versions Page), we can see that there are two instances there. And then also in the map you can see that new instance is there as well, starting its way from the left.
Comparison to the Standard User Interfaces
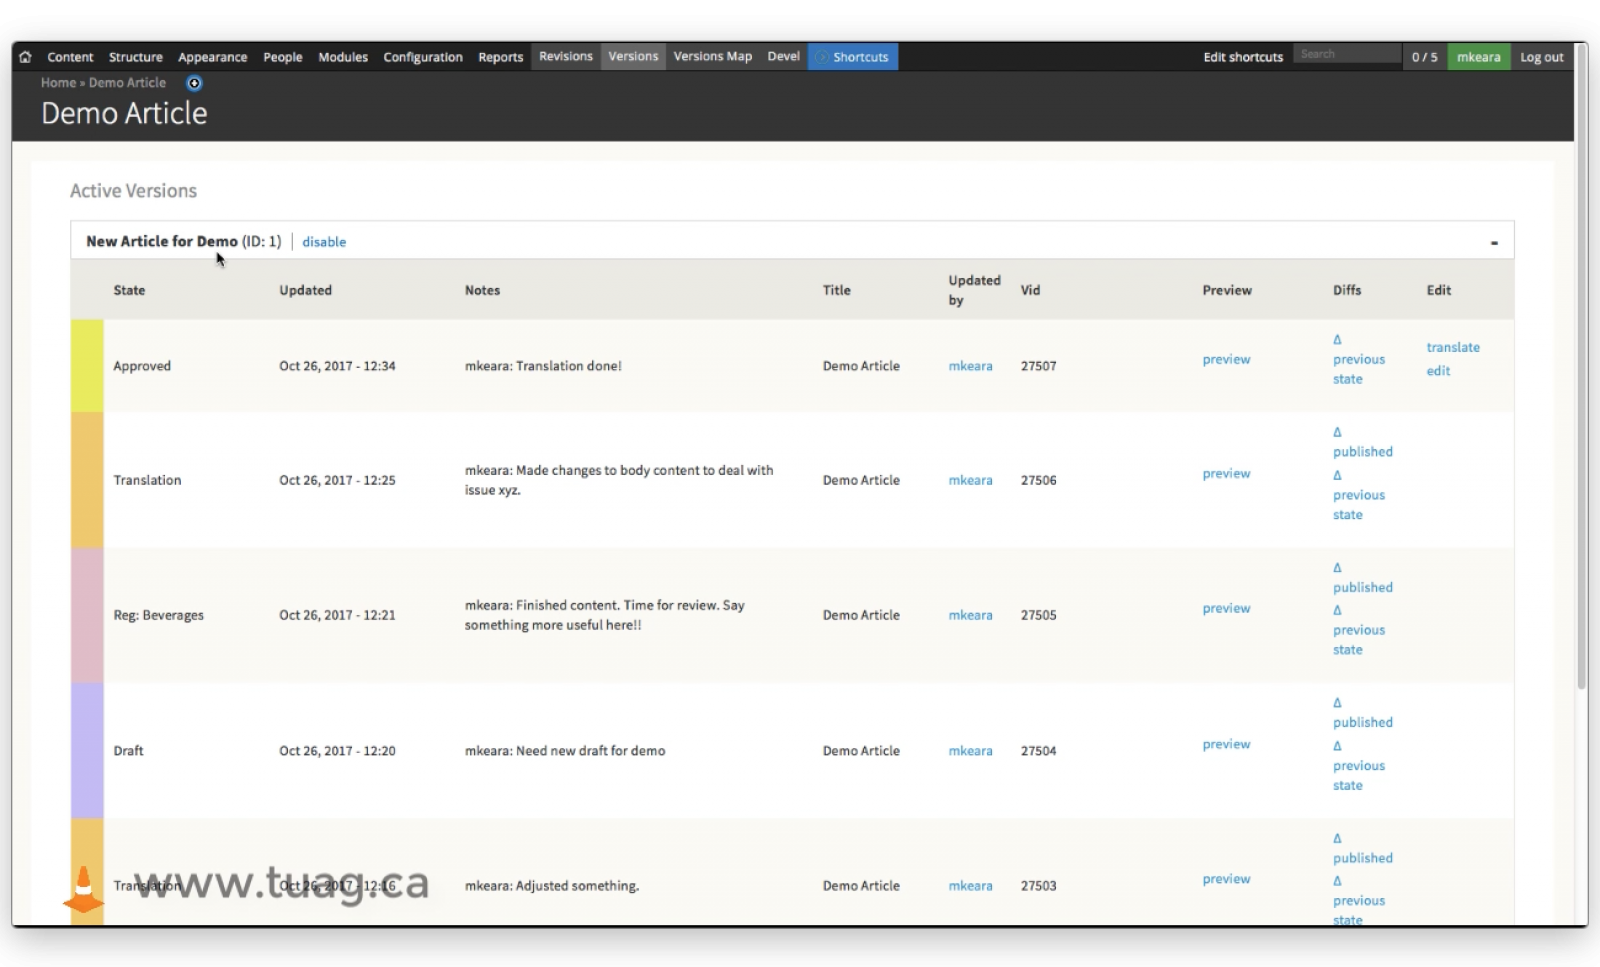
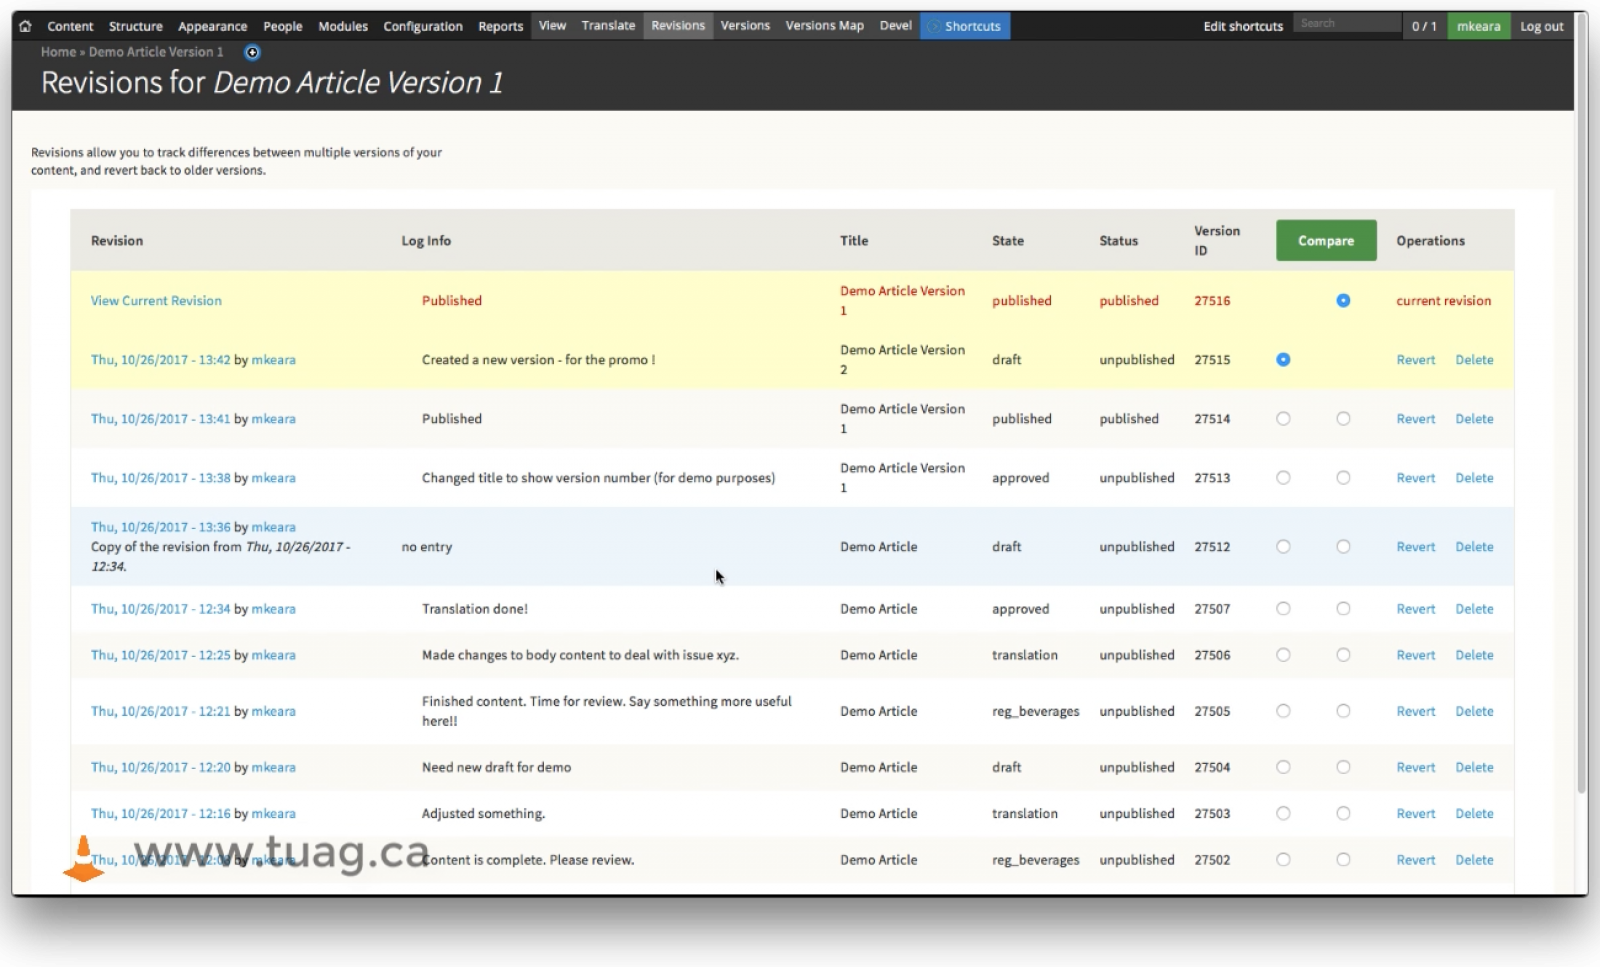
If you can compare this enhanced interface to the standard interface (here is the standard State Flow interface), the State Flow interface is very low level. It’s functional, but it does not give you a lot of cues, a lot of hints, a lot of context as to what they are doing, what they mean. And even more so, with the Revisions Table. It’s just all very low level: a bunch of text; a bunch of titles; a bunch of revision ids. As opposed to in the Versions where you can actually see useful information about collections of revisions that have something to do with our content publishing process within the business.